|
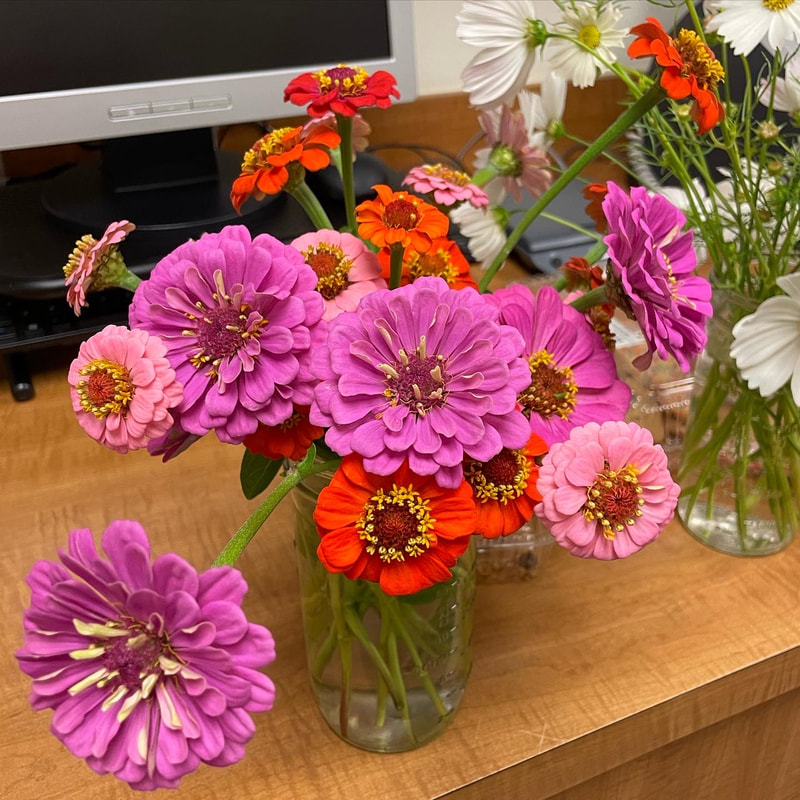
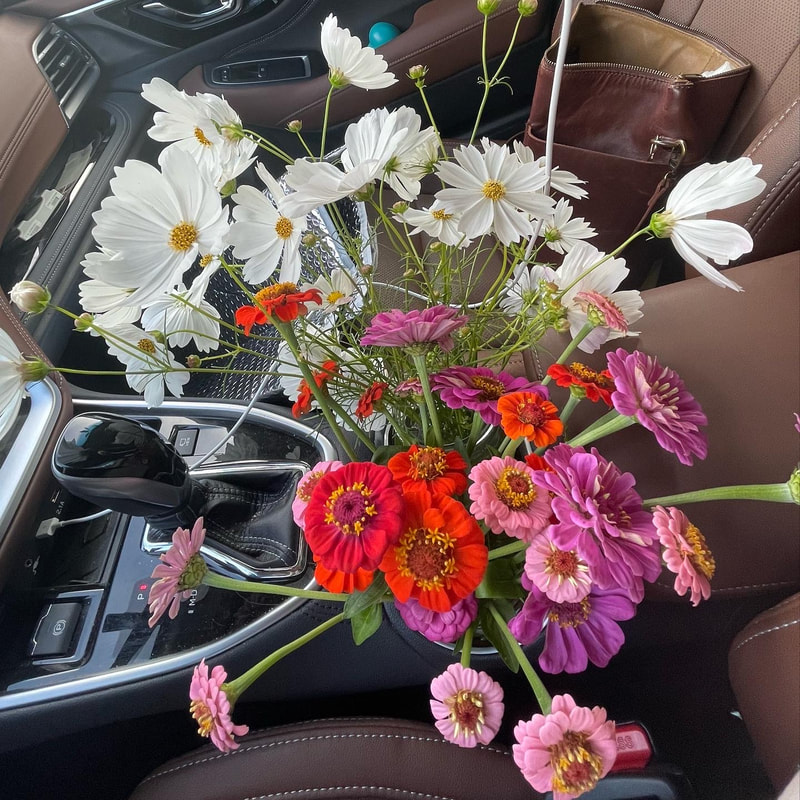
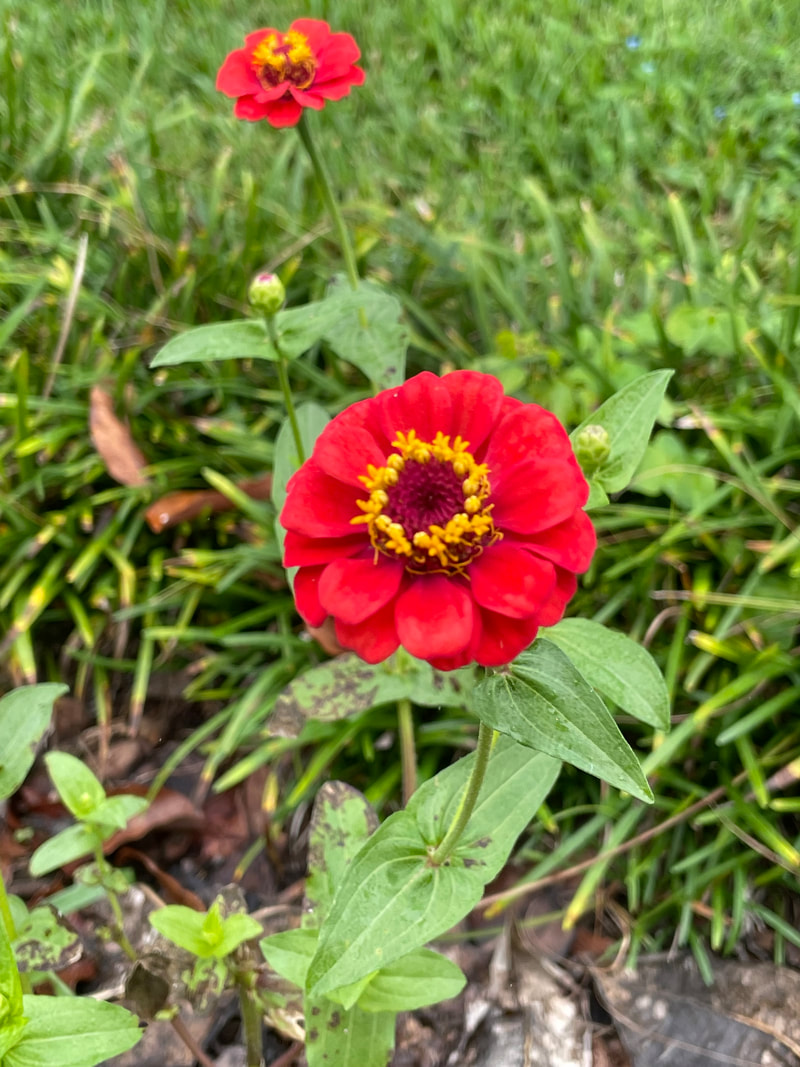
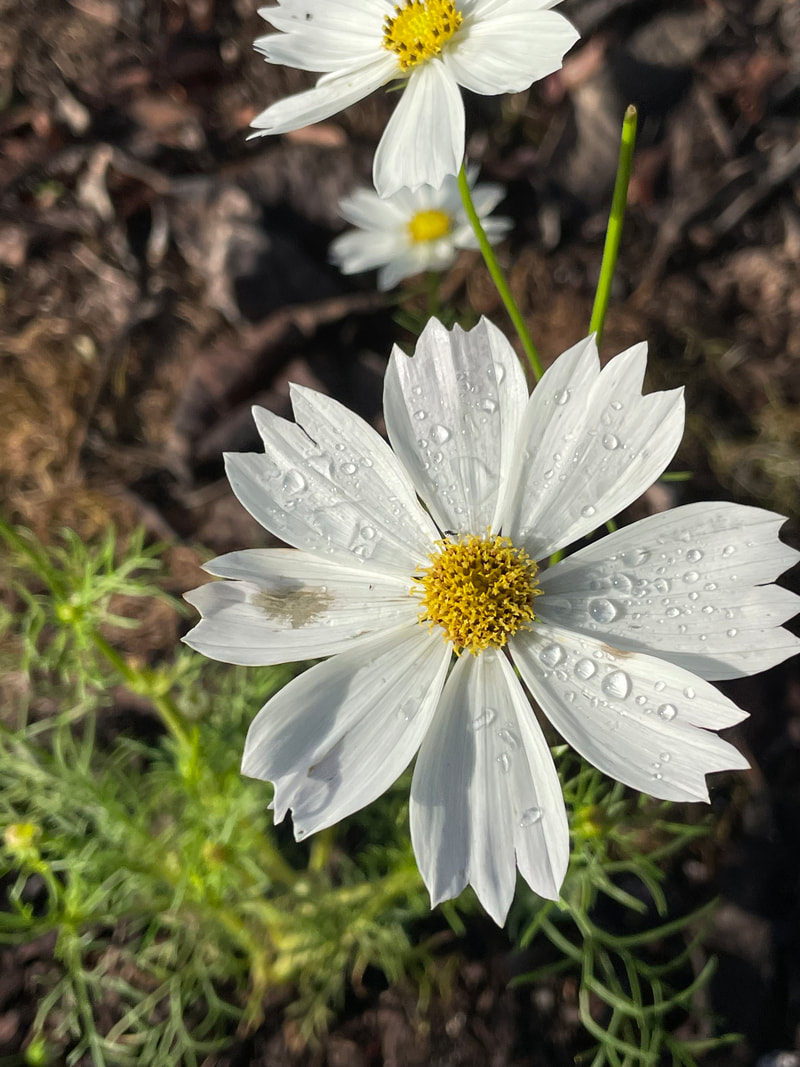
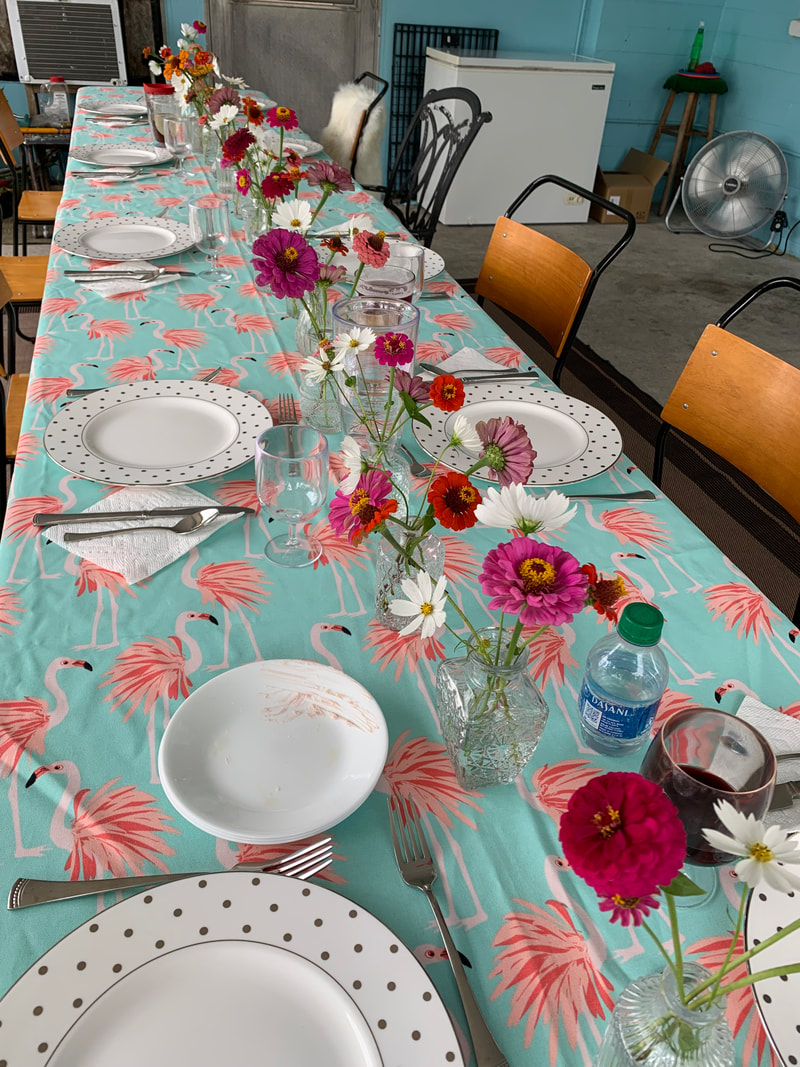
This spring, I decided to take charge in the yard and start growing a cut-flower garden in my back yard. Unsurprisingly, because I had mulled over the idea for years without finding solid information, I did not find a lot of good resources to go on. Florida, especially central and south florida, are challenging for flower gardening. It's hot and extremely humid, there are pests galore, and all the existing resources seem to have Georgia as the southernmost state. I found refuge in the instagram group, #FloridaFlowerGrowers though. And, through those lovely accounts I was able to pluck up the courage to grow my own cut flowers. What I GrewCosmos and Zinnias are the flowers I decided to give a go in September. I planted a tray of seeds to transplant out into the garden when they had some roots and true leaves. I didn't have irrigation and after temperatures were hovering in the low to mid 90s with little to no rain. So, direct sowing was out. I had marginal success. But, enough so that I'm encouraged to do more this year. It's January 2nd and I have just seeded some dahlia seeds, collected the last seed from my spent cosmo plot, and put in some very late ranunculus that I do not anticipate will do well. :( Lessons Learned As a first time flower gardener in Central Florida, here are my top lessons.
I just planted some dahlia seeds and ordered a boatload of new cosmo varieties to plant as soon as my ranunculus pop out some leaves and I can turn irrigation back on. I cannot wait to have all those fresh bouquets again! I had enough this year to dress the whole thanksgiving table for 14 people!
0 Comments
Today is an exciting day for one of the money pits I like to call my "photography hobby." Ha! Anyone who has been bitten by the photog bug likely sympathizes with that sentiment. I've loved photography since I took "Introduction to Darkroom Photography" in high school and while my tools have changed, the joy I find in it has not. 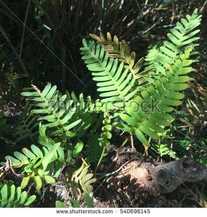 Today, my first stock photography portfolio has gone live! I've long considered entering the world of stock photography but haven't ever committed to it. I had several concerns, but it mostly boiled down to the fact that I would earn $0.25 an image download and have no control over how people used my photos. After years of mulling this over, I find that $0.25 an image download adds up over time and I could have made quite a few quarters in the last five years had I just gotten down off my high horse! 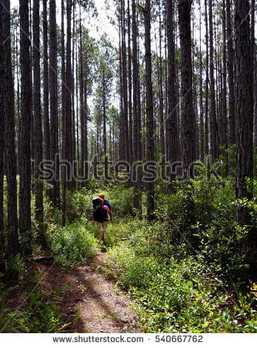 Like most photo hobbyists, I do dream of having a gallery opening one day. But for now, this is a great way to use all of my photos which are "all dressed up with nowhere to go" except take up space on my hard-drive. If I make a few bucks, excellent. If not, well, at least I tried. I take my camera everywhere anyways and feel that as a result of the industry I'm in, I have some insight into the gaps in current stock photo libraries and hope my contributions may help fill those gaps for others in outreach and environmental education. Am I going to contribute everything? No, I'll probably save my best for me, my family, and that dream of a gallery opening. But until that day, this could be a great way to pay for future equipment!     If you are interested in my stock photography portfolio, please visit it here: www.shutterstock.com/g/ShannonCarnevale .
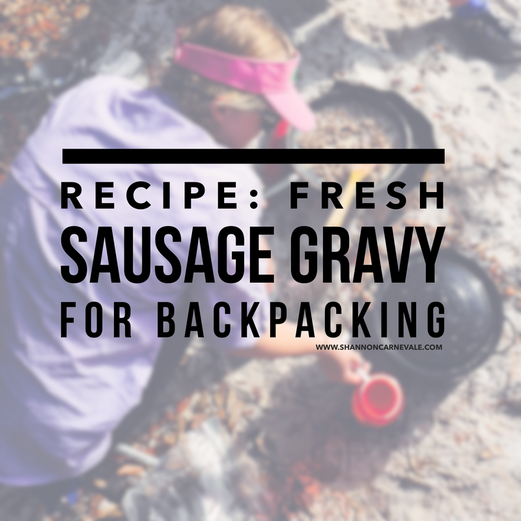
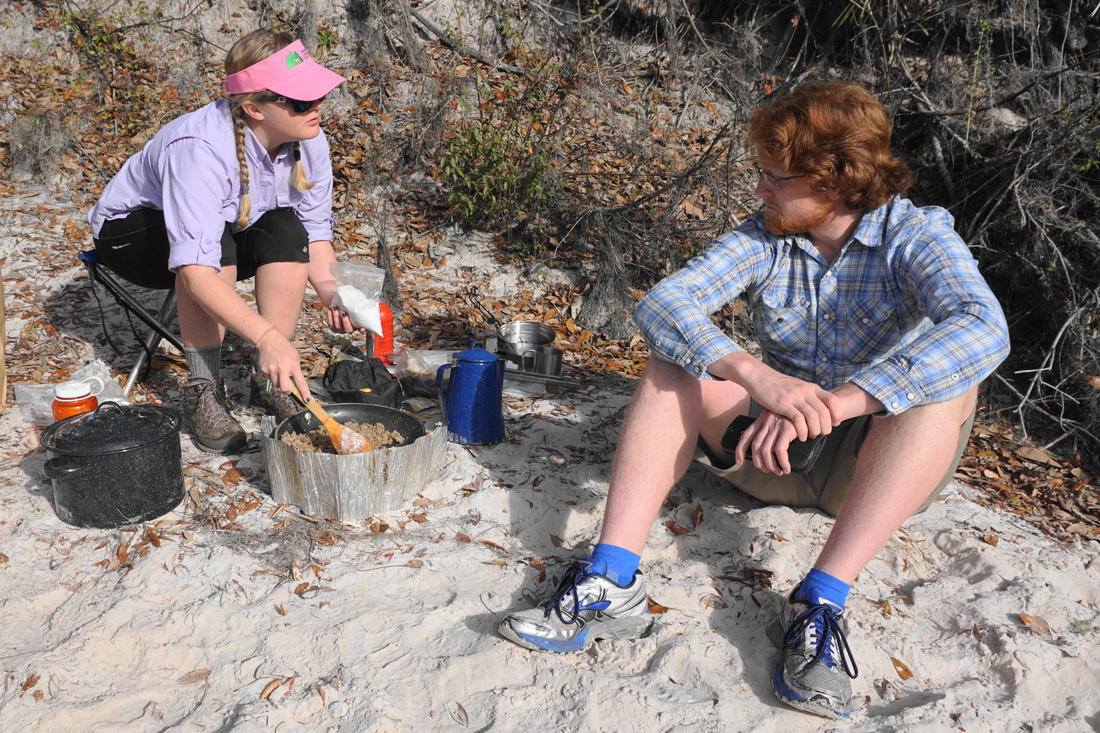
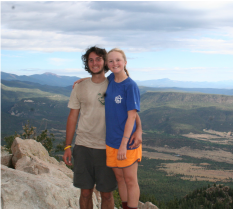
If you like what you see, please share it with your colleagues! 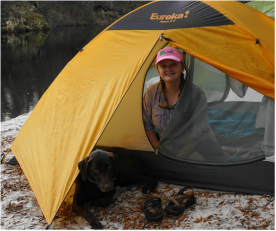 I've found, through some anecdotal evidence, that a hearty breakfast is the fastest way to get sleepy friends out of their tents on a brisk morning. Especially when that morning is during the first cold backpacking trip of the season. It's cold, your body aches, and you are so cozy in your sleeping bag - why on earth would you want to get up for some mediocre instant oatmeal and pack up camp? Just fifteen more minutes... That is, until you smell the fresh sausage cooking. 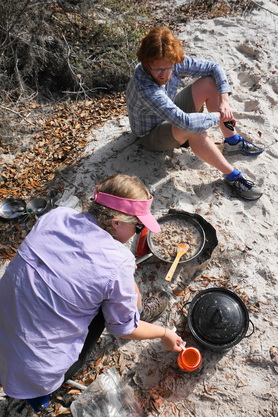 Teaching my brother how to make sausage gravy while backpacking on the Suwannee River (North Florida). Teaching my brother how to make sausage gravy while backpacking on the Suwannee River (North Florida). For short trips, or for the first morning on a longer trip, you can have fresh meat on a backpacking trip. We've discussed this before (see Bistec de Palomillo) and the same principle applies. You can take meat, uncooked, into the backcountry if you:
For our short trips (two-day) we will plan to bring meat for the first dinner if it is a long first day and the first breakfast, to encourage people to wake up cheerfully. For fresh biscuits and gravy, we bring store-bought biscuits from the bakery or make our own the day before the trip. We bring one small log of publix lean breakfast sausage (any brand or tube will do) and freeze it solid in the coldest part of our freezer for at least a week to ensure it is absolutely frozen to the core. When you get on the trail, keep the sausage double zip-top bagged in an insulated soft-cooler. In our part of the world, Central Florida, it will still be slightly frozen by breakfast time! Note: You do not want the meat to warm up prior to cooking. It should still be slightly frozen when you start to cook it. Or in other words, enough of the meat needs to still be frozen enough to keep the meat's temperature out of the "danger zone". Backpacking Biscuits and GravyFeeds six, I recommend trying this prior to getting on the trail and adjust the recipe accordingly to your group so as to avoid bringing too much food. Ingredients:
Directions:
 Did you enjoy this recipe? Please consider leaving a comment or sharing the image above on Pinterest or your social media of choice to spread the word. Thank you! Please note: We are not trained chefs or medical professionals. We are not responsible for any illness or other unfortunate event that may occur if you choose to make this meal on a backpacking, or other camping, trip. We have made this meal several times with no ill effect and are sharing our recipe to enrich others' experiences. If you have any questions or comments, please leave them below. My blog post, comments, and responses are never intended as medical advice.
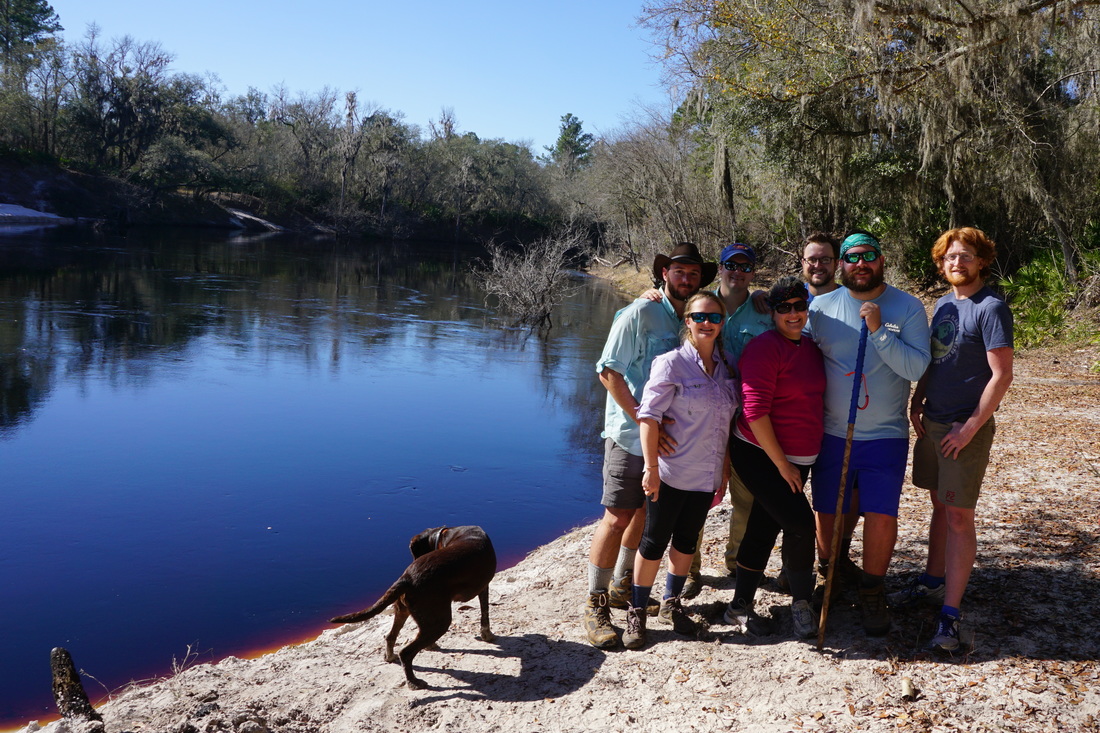
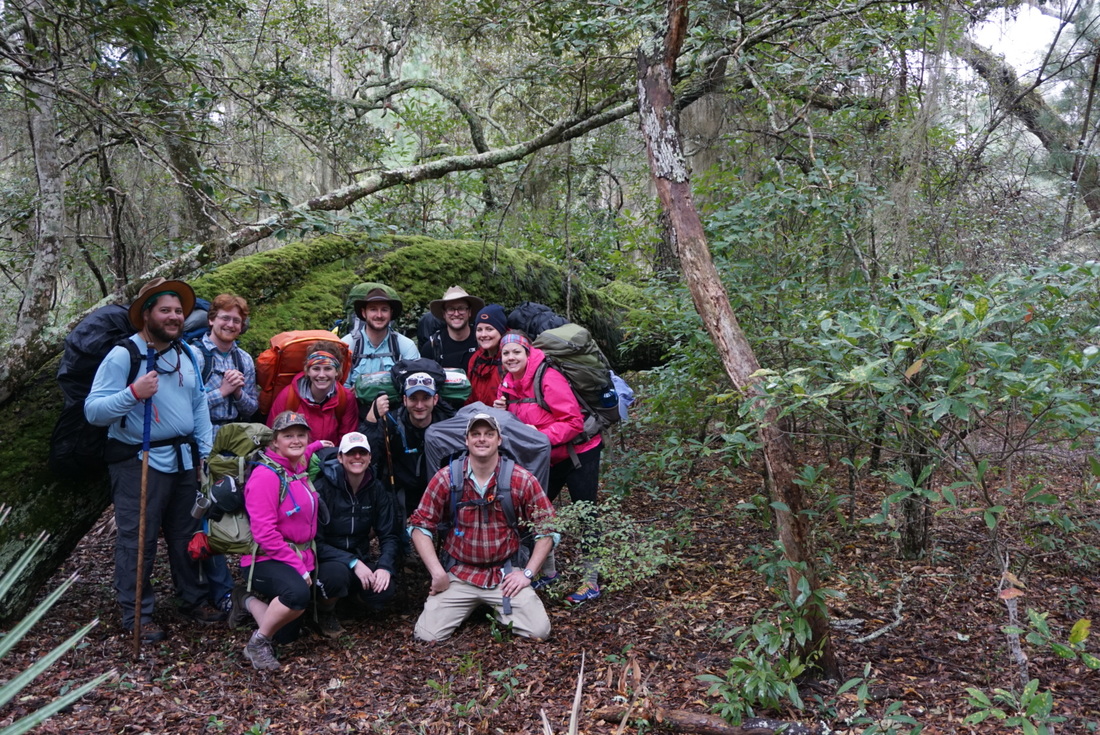
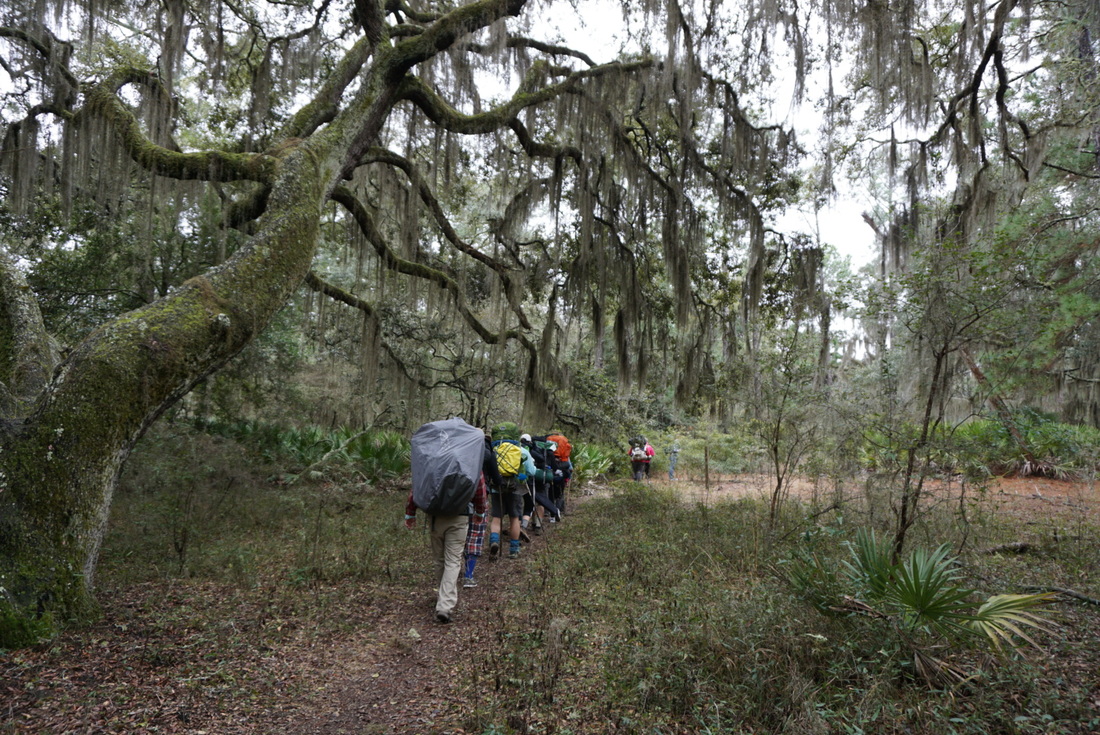
If you're an outdoorsy type of person and live in Florida or Georgia, there's a good chance you've heard of Cumberland Island National Seashore. One of the largest undeveloped barrier islands on the Atlantic Coast, Cumberland Island is an oak covered paradise only 45 minutes off the coast of Georgia via ferry. We've been trying to get to Cumberland Island for probably ten years now? I'm not sure. I had been dreaming of visiting ever since our high school biology teacher assigned a project on coastal ecosystems. I finally got around to editing the photos I took during our trip (in November, yikes!) and let me assure you, it lives up to all of the daydreaming. 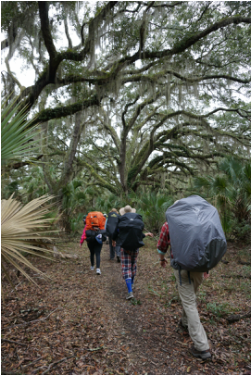 The island is covered in wind-worn oaks, spacious pine stands, salt marshes, and coastal scrub ecosystems. The island's 50-miles of trails are well maintained and campsites are intimate with vegetation cover and primitive benches. You aren't allowed to have campfires in the wilderness camp sites so if your camping experience requires s'mores, stay at the Sea Camp or Stafford Beach campgrounds. You can learn more about the camping arrangements at this website. NOTE: All camping requires a permit and some campsites are first-come first serve. There is non-potable water available in the wilderness area from a sulfur well; so, make sure you bring some Gatorade if you are sensitive to the flavor. We stayed at the Hickory Hill wilderness campsite and had plenty of room for three large tents (4 person) and three small tents (2 person). Hickory Hill is a nice and easy 5.5 mile hike from the ferry drop off so you'll have time to explore once arriving at camp. It rained for most of our trip, but like all Florida hikers we relished in the cooler temperatures and misty ambiance. I'll take drizzly and cool over hot and muggy ANY DAY. The cold weather inspired one of the best backpacking meals of my life thus far ... fresh from scratch Fettuccine Carbonara with peas and bacon. To die for. Recipe post coming soon! If you get the chance, I highly recommend a weekend at Cumberland Island National Seashore. As the second National Park System trip I've done where you must take a ferry, I can personally recommend this style of camping for a relaxing and more secluded wilderness experience close to civilization. Have fun and get outdoors!
Bok Tower Gardens is a jewel of a garden located in Central Florida. Perched atop Iron Mountain, the highest point in peninsular Florida at 324 ft above sea level, Bok Tower Gardens includes an impressive 126 varieties of plant life and a gorgeous pink marble carillon. 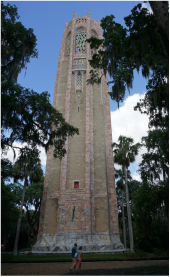 The gardens themselves were designed by Frederick Law Olmsted Jr., the most distinguished landscape architect of the early 1900's. Olmstead designed such well known public places as the White House, the National Zoo, and the Washington National Cathedral. Olmstead's father designed Central Park in New York. While some of the plants present are not native to Florida, Bok Tower also has a Florida endangered species garden. Bok Tower Gardens is named for the 205 foot neo-Gothic pink marble "Singing Tower" which sits at the peak of Iron Mountain. The tower houses a 60 bell carillon which plays concerts daily over the gardens. 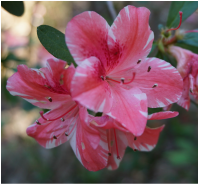 Why visit in February and March? Well, for one thing it is some of the best weather Florida has to offer. Often cool and dry, February and March are gorgeous times of the year to visit the Sunshine State. But the best reason to visit has to be the azaleas and camellias. Peak Bloom usually occurs throughout February but can start in January and bleed into March. We've visited the Gardens during peak bloom several times over the years and it is truly spectacular. The gardens leading up to the singing tower are a cascade of pinks, corals, whites, and tie-dye azalea flowers. Everywhere you look, you will see another new plant to investigate. For those wanting to visit Bok tower garden, I recommend wearing comfortable walking shoes, bringing a good camera, and a water bottle. If you'll be taking photos of yourself and your family, I recommend this small, lightweight tripod (like this one, which I love for backpacking) and if you're using a dSLR camera, a small remote like this one (Sony), this one (Nikon) or this one (Canon). This will allow you to easily take gorgeous family photos or get a sharp macro shot of your favorite plants. I have personally purchased each of the products above, for myself and for family, and can honestly say they are great and inexpensive. Did you know Bok Tower Gardens is a private botanical garden? This means you can bring in your own picnic, including wine or beer if you are so inclined. Alternatively, you can purchase lunch from the Blue Palmetto Cafe located near the welcome center for a wonderful lunch. The chef at the cafe has great taste and routinely has seasonal specialties using local ingredients.  River camping is a fantastic activity that combines the best of car camping with the best of backpacking. It allows you to retreat into a remote area, like when backpacking, but bring some of your favorite creature comforts along, like with car camping. Keep the following tips in mind when planning a river trip and you’ll be happy as a clam. Everything Will Get Wet. Notice, I didn’t say “may get wet!” Consider every piece of gear in your canoe or kayak as an object that will be subjected to splashing, small leaks, and even rain. Prepare as needed, and you’ll be a much happier camper, especially in the winter! To make all your gear water resistant, purchase large drybags and use those to pack everything from clothing to sleeping bags, cooking equipment to the tent, and even firewood. Firewood can be double bagged in durable garbage bags and in most cases, should stay dry. Pro Tip: Bring at least one ‘chemical’ log for each evening fire you plan on having. The chemical logs burn hot enough to help light damp firewood but not hot enough for soaked firewood. Campsites Change Whenever we canoe camp, we prefer to camp on sandbars and other open areas along the edge of the river where it is possible to drag your vessel up onto shore and tie off. Hauling all your gear out of the boats every night to set up camp and back in the morning to pack up gets old, FAST. With that in mind, keep in mind that sandbars are not static things. Sandbars and related camp areas may move, change, be flooded, or even disappear depending on recent river conditions. If canoeing in an area where you can talk to a land manager, call them and ask about camping conditions. There may be established camps, like on the Suwannee River, that you can rely on as a backup plan. If not, keep an eye on the time as you paddle. If it is getting late in the day, settle for the best site you can find with enough time to set up camp before nightfall. Cook Real Food When river camping, especially in cooler weather, you shouldn’t have to resort to dehydrated food. Bring a camp stove, some pots and pans, even a dutch oven, and bring great food to feast on. Remember, this is slightly less convenient than car camping. With a gas stove and a fire, you can make a large variety of food that will keep any camper happy. I recommend some simple recipes to start, but remember to keep all meat colder than 40 degrees:
Nothing makes for grumpy campers faster than being cold, wet, and hungry. Cook real food. Trust us, these recipes are perfect for your hungry friends and family.http://amzn.to/20PBhOf Pro Tip: If you’re of age and interested in happy hour, we always plan light hor d'oeuvres and a cocktail to keep our canoe-mates full and happy while we set up camp and cook. Bring some durable containers that are made of plastic - not glass! The last thing you want in a wet canoe is broken glass. I recommend this metal bottle and this plastic flask; they are great for pre-mixed cocktails or for bringing wine/ingredients. I hope you have a great time canoe camping and enjoy the perks of getting outdoors with a little bit of luxury. If you have any questions, please let me know and I'll be glad to help! Happy camping! Like what you see? In the interest of full disclosure, I may earn a small commission when you purchase items through the links provided here. There is no increase in cost, to you or anyone else, associated with these links. I only recommend products myself or my close friends have used and love.
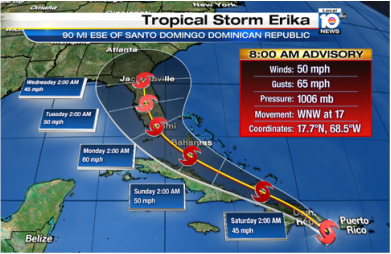 As Tropical Storm Erika moves closer, I’m reminded of how long it has been since anyone took a hurricane threat seriously in Florida. By most accounts, we haven’t had a ‘serious’ storm since 2004 or 2005. Currently, this storm’s track and intensity do not warrant full-on preparation measures; however, why aren’t people using this storm as a reason to practice? It goes without saying that stronger storms warrant a well-planned hurricane preparation schedule. The average family will need to restock their pantry with emergency supplies like food, batteries, flashlights, drinking water, etc. Other considerations must be taken by those on prescription medication and those with elderly, very young children, or pets in the family. Plus, it’s Florida, so a lot of people have pools, boats, and outdoor entertaining furniture to deal with. Erika may bring much needed rain to southeast Florida but it may just as well dump large amounts of rain on saturated central Florida. If Erika’s rain impacts Polk County, I don’t know how bad the flooding would be but if we see anything like the nine inches of rain over six hours, like Dominica just did; there will likely be flooding on Highway 98, in Downtown Lakeland, and in several residential areas of Winter Haven and south Lakeland. Polk County has, for the most part, had a very average year in terms of the amount of rain we’ve seen; however, the ground is saturated from recent afternoon storms. Personally, I'm very glad we decided to purchase flood insurance this year. As new homeowners we decided that a few hundred dollars worth the investment in our sanity. We've been high and dry compared to other areas of the County but tropical storms have a history of gusty, unstable winds and intense amounts of rainfall. If Erika continues on the current path, I should expect nothing less. The thought that keeps coming to mind is, “they said Andrew would turn, too.” To learn how to prepare your boat, home, business, etc for an impending storm, check out UF/IFAS Extension Polk County's hurricane page.
 Brain-Eating Ameba, also referred to as Amoeba (British English), terrifies parents up and down the Florida peninsula. Think about it: Is there anything else in Florida that sounds so horrific? We're talking about a microscopic organism literally named for it's habit of infecting the brains of people who play in lakes. Even though snakes, alligators, and crocodiles get a bad reputation for being dangerous at least you can see them coming! Not the case with Brain-Eating Ameba. Brain-Eating Ameba, is actually a microscopic organism, assumed to be present in nearly all Florida's fresh-water water bodies like lakes, canals, and ponds. The often ill-fated disease caused by Naegleria fowleri is "Primary Amebic Meningoencephalitis" or PAM. According to the Center for Disease Control and Prevention (CDC) only 132 people have been infected since 1962. Unfortunately, all but three have died from the infection. Have I scared you enough yet? Don't worry. As you can tell by those statistics, the infection is incredibly rare. Fortunately, reducing your risk and your friends' and family's risk is easy.  Brain-Eating Ameba is found in the mud of warm water lakes and ponds. To avoid infection, avoid stirring up the sediments in warm freshwater. Keeping one’s face away from stirred up sediment in warm water will significantly reduce the risk of infection. Children, especially young children, should be discouraged from digging in mud and sediments in lakes and ponds where they may be playing. This includes diving down to the bottom of a lake to dig plants or other things up. 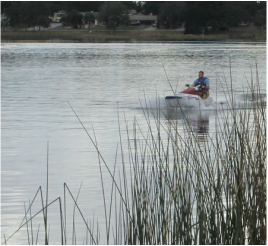 Amebas infect people when contaminated water travels up the nose and the ameba travels to the brain. Infections usually occur in July, August, and September but in Florida the season may start earlier and end later in the year due to our prolonged warm weather. This is important if you are one of the many people who like to like to participate in such activities as water skiing, wake boarding, tubing, or other water activity in the summer. When participating in these summertime activities, it is common for water to be forced up your nose. You can reduce your risk of infection during these activities by wearing ear plugs and a nose clip. You cannot be infected through drinking contaminated water, eating fish from contaminated water, or by talking to, touching, or being around another person infected with brain-eating ameba. Additionally, you cannot catch Naegleria fowleri from salt water. If you suspect you or someone you know may have contracted brain-eating ameba, check the following symptoms and call a medical professional immediately. Symptoms usually start 5 days after infection but may range 1-7 days from time of infection.
After symptoms present, death usually occurs within five days but may range from one day post-infection to twelve days post-infection. In the few known cases of survival, the patients recognized the symptoms early and sought proper treatment immediately. Share this information with everyone you know who enjoys our many gorgeous water features in Florida; this information may save a life! Avoiding Brain-Eating Ameba is easy and with a little knowledge, we can all have a safe and adventurous summer. 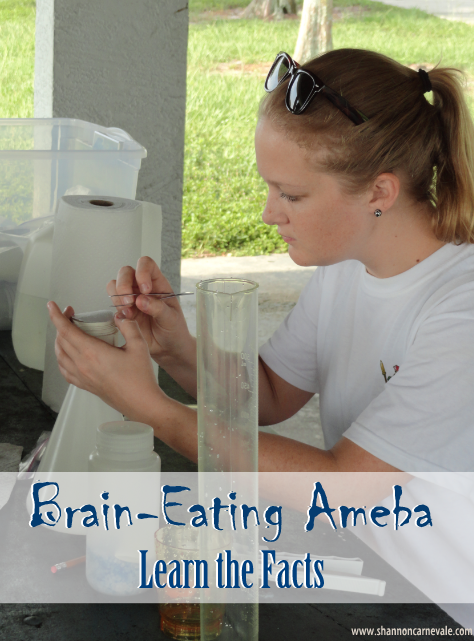 Did you find this article helpful or informative? Pin the above image to share this post with others!
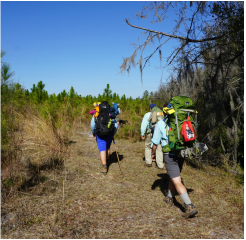 Backpacking along the Suwanee River, 2015 Backpacking along the Suwanee River, 2015
Close your eyes. Imagine your stereotypical backpacking trip. You've hiked all day. If you're in Florida during the summer, you're bug bitten and hot in the face. You're probably near water and you're probably tired. Meal time. What's for dinner?
If a dehydrated, one-pot meal came to mind, you've probably done this before. Now, what if I told you that we can change that? Imagine instead, same scenario, you come into camp eagerly anticipating from-scratch linguine alfredo carbonara and cocktail hour with sliced salami and location-themed cocktails. All of a sudden, eating dinner goes from a chore to an activity among friends. 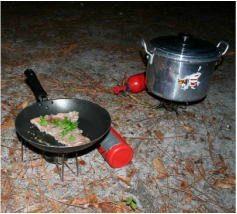 Cooking one of our first Bistec de Palomilla steaks in 2005 Cooking one of our first Bistec de Palomilla steaks in 2005
We gave up the dehydrated style of backpacking in 2005. I took a backpacking class during my time at UF mostly for kicks but also because I needed a one-credit class to round out my semester enrollment. Every student had to plan a two-night backpacking trek for at least three friends. Additionally, there were three percentage points of extra-credit on the table for the backpacking trip which planned and executed the best menu. Challenge accepted!
By this time, I had been on more backpacking trips than I could count and hiked Philmont Scout Ranch twice (100+ mile treks). Feeling that we should take things up a notch to keep it interesting, we decided to remake one of our favorite meals - Bistec de Palomilla with yellow rice. The recipe, a great first foray into fresh food while backpacking, is at the end of this article.
To make real food while camping, there are a few things you need to do and know.
Carnevale's Backcountry Bistec de Palomilla
Ingredients: (serves four)
Recipe:
When you get to camp, fire up your camp stove or a campfire to cook your rice and then, 'cook' the steaks. Remember, the meat is cooked already, all you have to do is heat it up! You'll want to cook each steak for a few minutes over high heat; until it is texturally like a steak cooked to medium. Try not to overcook it, err on the side of medium-rare as opposed to medium-well; these acid-soaked thin sirloins will turn to shoe leather if over-done! When the steaks are done, remove them and throw your probably thawed yellow rice in the pan with the steak juices. Heat until warm throughout and dish out to your hungry campers!
Keeping the meat safe, while un-refrigerated, is a top priority but always a gamble. This recipe keeps the meat as cold as possible for as long as possible and as a contingency plan, soaks the meat in a high-acid environment. This high-acid environment essentially "cooks" the meat while providing inhospitable conditions for food-borne pathogens; the same process which is at work in any ceviche dish.
Please note: We are not trained chefs or medical professionals. We are not responsible for any illness or other unfortunate event that may occur if you choose to make this meal on a backpacking, or other camping, trip. We have made this meal several times with no ill effect and are sharing our recipe to enrich others' experiences. If you have any questions or comments, please leave them below. My blog post, comments, and responses are never intended as medical advice.
Our MSR Dragonfly stove was purchased over ten years ago with no compensation for my opinion. However, in the interest of full disclosure, I may earn a small commission if you purchase items through the link provided here. There is no increase in cost, to you or anyone else, associated with these links. The following is the introduction to a letter to the editor I submitted. Since The Ledger (Lakeland, FL) published it, I will not re-publish the entire article. Please click the link to visit The Ledger's website and read the article! The Ledger has been, and continues to be, very supportive of outreach-themed "Letters to the Editor" and I highly encourage you to consider writing one. The opinion section of the paper in this day and age tends to be filled with complaints and anger. Why not inject some inspirational messaging into that section? See my article, below, and if you are inspired to write a Letter to the Editor, let me know in the comments! Please Join the National Campaign to Combat Invasive Species in U.S. Published: Tuesday, March 3, 2015 at 12:01 a.m. National Invasive Species Awareness Week was developed to help slow the spread of invasive species across our landscape. Non-native plants, animals and pathogens can harm humans and the environment and impact our nation's economy. The damage done by invasive plants alone costs the U.S. an estimated $34.7 billion a year. Through NISAW, we hope to elevate the level of awareness regarding invasive exotic species and their impacts. To read the rest of my article, which includes easy ways for every resident to get involved in #NISAW, click here. Carnevale, S. “Please Join the National Campaign to Combat Invasive Species in U.S.” The Lakeland Ledger 3 March. 2015: A4. Print.
|
The
|


 RSS Feed
